
Wondering how to setup RetroPie DS to play your favorite Nintendo DS games on your television? Lucky for you, we’re going to show you how to easily get your Raspberry Pi setup for using RetroPie and DraStic for playing some fun retro games on the big screen without needing the original Nintendo DS handheld.
How To Setup RetroPie for DS?
What You’ll Need
If you don’t have one yet, you’ll need your own Raspberry Pi device – you’ll obviously need one in order to finish this tutorial and you can grab a Raspberry Pi 4 here off of Amazon for around $100Also, go ahead and download RetroPie from the official website hereIf you plan to download the required files and ROMs on your Raspberry Pi, you’ll also need a keyboard and mouse to use with itDon’t forget to get your DS ROMs ready to play games (keep in mind that the DraStic emulator accepts the following file extensions: .nds and .zip)You’ll also need to have a controller and we recommend you go with the 8Bitdo SN30 ProIf at any time you’d like to consult the official RetroPie docs, you can do so on their website here.
1. Setup Your Raspberry Pi
DraStic is one of the best DS emulators you can use on RetroPie. You can easily install the DraStic emulator on RetroPie by doing the following:
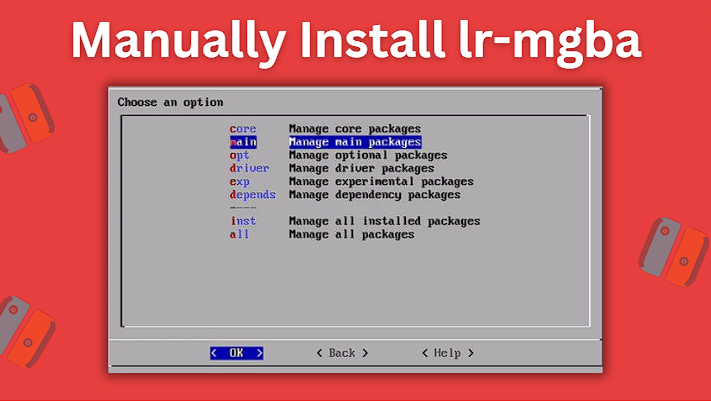
In RetroPie settings, head to RetroPie SetupNext, go to Manage packages > Manage main packagesGo down and then choose DraSticAfter that, choose Install from pre-compiled binaryLet RetroPie download the DraStic emulator and once it finishes, you can go back through the menu and choose Exit
2. Put Your DS Roms Onto Your RetroPie
We’ll now be moving our DS ROMs onto RetroPie.
Move ROM Files Using Your Raspberry Pi
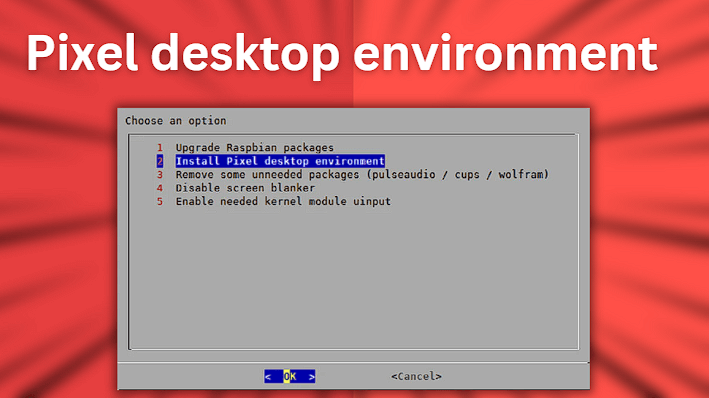
You’ll need to have the Pixel desktop environment tool installed on your Raspberry Pi to be able to access desktop mode on it. We’ll now be covering how to get this setup.
Head to the RetroPie options menu and then go ahead and go to RetroPie Setup > Configuration / Tools > Raspbian Tools > Install Pixel desktop environment.
After you have successfully installed the Pixel desktop environment on your Raspberry Pi, go ahead and restart the device. After restarting, you should now be able to access desktop mode by going to Ports > Desktop.
The desktop environment allows you to navigate the files on your Raspberry Pi similarly to how you would on a Windows computer.
Now that we’ve installed the desktop environment, we’ll need to move our DS ROM(s) to the proper folder on our Raspberry Pi:
/home/pi/RetroPie/roms/nds/
Remote Access Your Raspberry Pi From Your PC
The easiest way to get files from your PC computer to your Raspberry Pi is by remotely accessing the Pi from your PC. To do this, you’ll first want to make sure that your Raspberry Pi is connected to the same network as your PC.
First make sure your Pi is connected to your WiFi or to your network router directly using an ethernet cable.
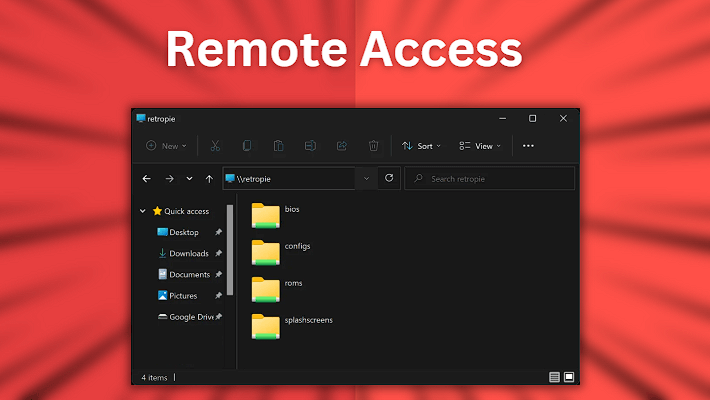
Open up the Windows file explorer on your PC and type \\retropie into the address bar at the top. After waiting for a few minutes, your Raspberry Pi should appear. If it doesn’t appear, there are a few additional steps we’ll need to take. If yours does appear, you can go ahead and skip to directly below the Remote Access screenshot shown down below.
On your Raspberry Pi, open the terminal window and type in:
sudo apt-get install xrdp
This command will now begin to install the remote desktop server.
Now you’ll need to figure out the IP address of your Raspberry Pi. To do this type, you’ll want to use the following command:
Make a note of your Raspberry Pi’s IP address because we will need to use this soon in order to connect to it remotely. You’ll also need your Pi’s username and password.
Now on your PC, go ahead and open the remote desktop app by typing remote desktop into the Windows search bar in the bottom left. Click remote desktop connection to use the remote desktop app.
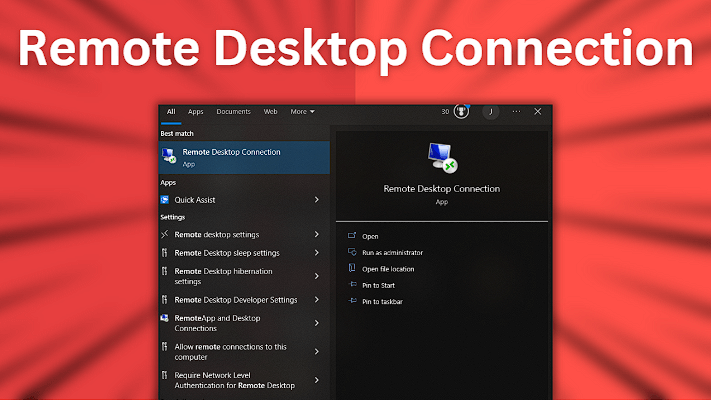
Search for and select Remote Desktop Connection on your PC
In the Remote Desktop Connection window that pops up, you’ll now want to enter the IP address of your Raspberry Pi that you got earlier. After clicking connect, then login using your Raspberry Pi’s username and password.
If everything went correctly, you should now be able to remotely access your Raspberry Pi from your PC. To double check that you are able to access your Raspberry Pi remotely, open up Windows File Explorer and type \\retropie into the address bar. You should see your Retropie files appear.
Whether your Raspberry Pi appeared automatically or you needed to do the additional steps, now we’re moving on to the final parts.
Remember earlier, we mentioned that we would need to copy our DS ROMs from our PC to this directory on our Raspberry Pi:
Navigate to roms > nds and copy your DS ROMs files from your PC to this folder in your Raspberry Pi. After you’ve copied your ROMs over, restart your Raspberry Pi and the games should now appear as expected.
3. Play Your DS Games
Now that your Raspberry Pi has been restarted and is all setup and ready to go, you can boot up EmulationStation and once you highlight Nintendo DS, it should show you at the bottom how many games are available to be played for it. You’re now all ready to play!
If you’re a fan of RetroArch, be sure to check out our guide on how to setup the RetroArch DS core DeSmuME.
This article may contain affiliate links. If you use these links to purchase an item, we may earn a commission. Thank you for your support.
Source link


 – Pure Nintendo")

