
As the technological world advances, the need for secure communication grows more crucial by the day. VPNs, or “Virtual Private Networks,” have become pivotal in maintaining online security.
However, there are many ways in which network providers and institutions can block a VPN connection. You can circumvent these blocks by setting up your very own VPN over HTTPS with SoftEther.
Here’s how SoftEther works, how it differs from popular VPN services, and how to install your own SoftEther VPN on an Ubuntu Linux Server.
What Is SoftEther and VPN Over HTTPS
Most VPN service providers use a standardized set of ports and protocols. These connections are easily blocked at the firewall level or by forcing traffic through a web proxy server.
If your local network firewall is preventing VPN connections, how can you overcome it? The answer lies in routing the VPN tunnel over HTTPS. A SoftEther VPN uses the Hypertext Transfer Protocol Secure (HTTPS) as the transport protocol. SoftEther creates a secure VPN that can pass through almost every firewall or proxy server.
This is made possible because HTTPS traffic, which is essentially web traffic, is not typically blocked by firewalls. This ensures a reliable and uninterrupted connection.
SoftEther, which stands for “Software Ethernet,” is an open-source, cross-platform, and multi-protocol VPN solution. This little-known platform was developed by the University of Tsukuba and is characterized by flexibility and robustness.
You can install SoftEther clients using VPN over HTTPS on Windows and Linux.
How to Install and Configure SoftEther on Ubuntu Linux
SoftEther is known to run best on CentOS Linux, but it can be adapted to run just fine on Ubuntu. The online support environment for Ubuntu is huge, which is why it’s a great choice to host your SoftEther VPN.
While this guide is quite straightforward, some knowledge of Linux systems is required to get it up and running. A few prerequisites should also be in place before you start.
SoftEther VPN Prerequisites
Ubuntu Server (22.04.x LTS), ideally using a virtual private server Publicly routable IPv4 or v6 address Root administration access A /var/ partition with at least 10Gb of free space SSH Correct network configuration. Here’s how to configure a network on Ubuntu server, if you need a refresher.
Installing SoftEther on Ubuntu Server
Fire up your Ubuntu server and login as root.
The first step is to update your software and repositories.
apt-get update -y
Now we need to install the required dependencies for the SoftEther software.
apt-get install build-essential gnupg2 gcc make -y
Then download the SoftEther server. You’ll need to browse for the latest version of the software using the Lynx terminal based browser.
To do that, first install lynx.
apt-get install lynx -y
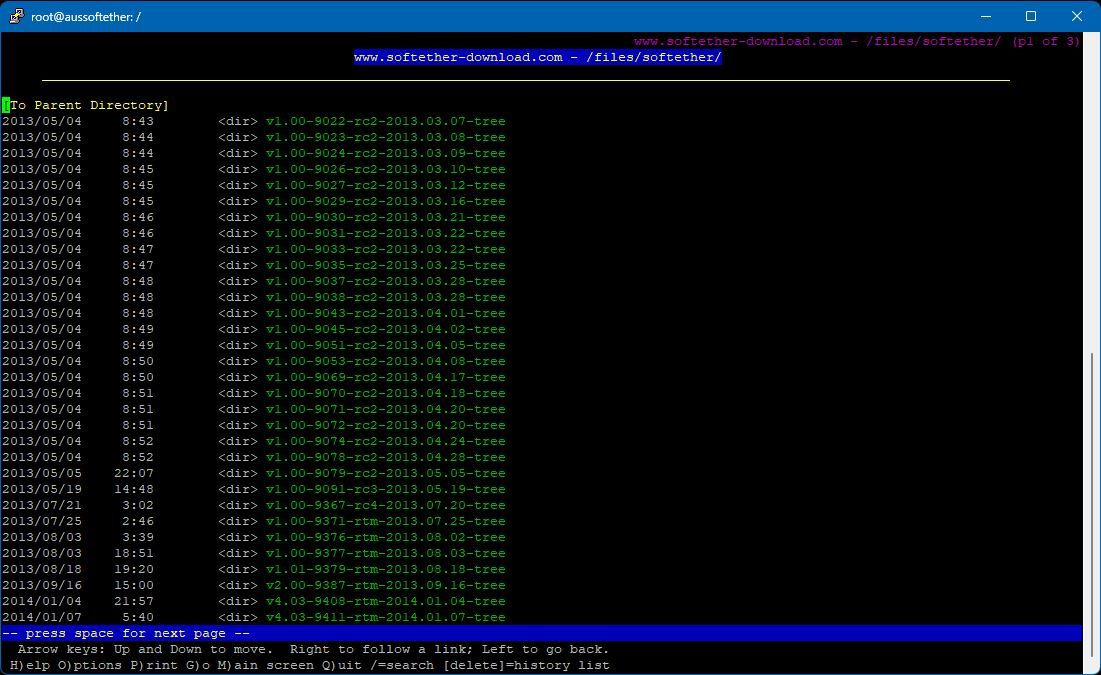
Now open the SoftEther download page inside the browser.
lynx http:
Use the arrow keys to browse for the latest version. Highlight the latest version and hit enter.
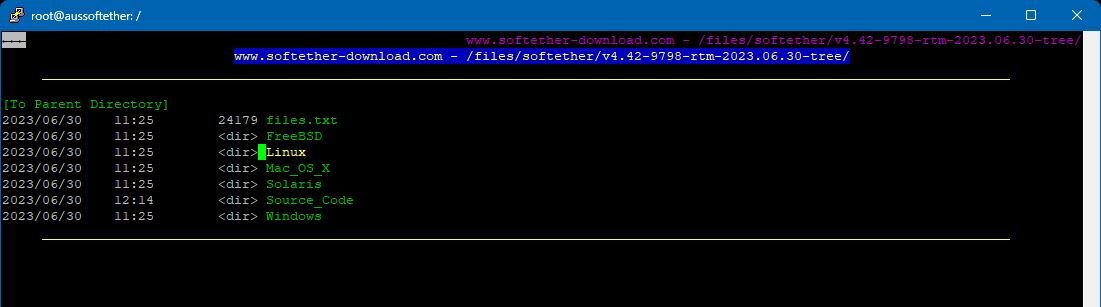
Highlight “Linux” and hit enter.
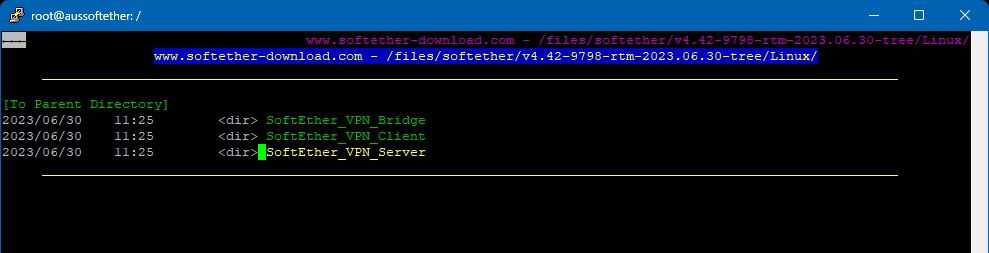
Now highlight “SoftEther_VPN_Server” and hit enter.
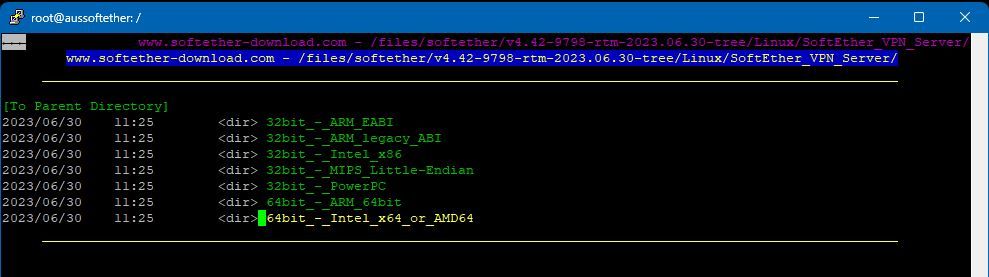
Finally, select the version your architecture supports (most likely this will be 64bit_-_Intel_x64) and hit enter one last time.
Now highlight the .tar.gz file and press “d”. The file will now download.
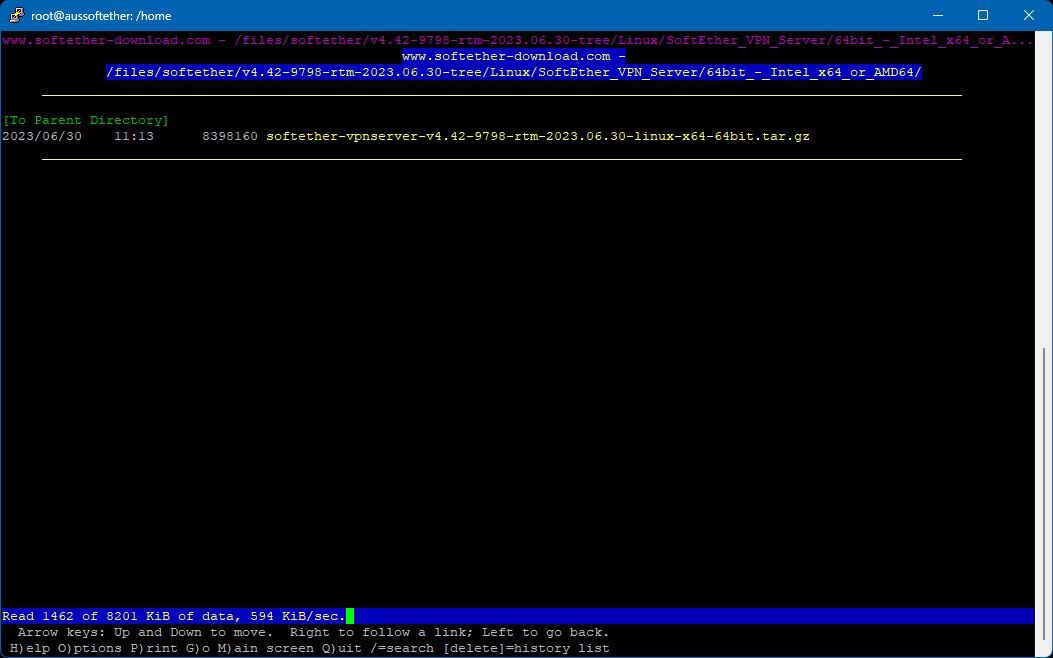
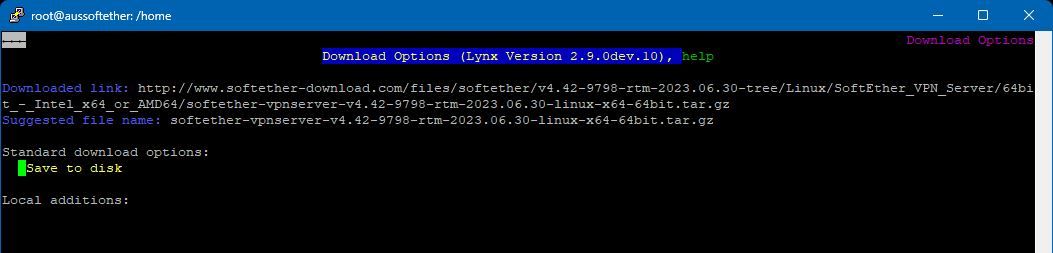
Finally, Select “Save to disk” and then press “q” to quit the Lynx browser.
Next step is to extract the archive. Note that your file name might be different if you have downloaded a newer version.
tar -xvzf softether-vpnserver-v4.42-9798-rtm-2023.06.30-linux-x64-64bit.tar.gz
Navigate to the newly created vpnserver directory
cd vpnserver
Next, issue the make command to compile the software.
make
You should see the following output at the end of the process:
*** PacketiX VPN Server HTML5 Web Administration Console (NEW) ***This VPN Server / Bridge has the built-in HTML5 Web Administration Console.
After you start the server daemon, you can open the HTML5 Web Administration Console is available at
https:orhttps:
This HTML5 page is obviously under construction, and your HTML5 development contribution is very appreciated.
make[1]: Leaving directory ‘/root/vpnserver’
The next step is to move the newly compiled software and directory to /usr/local.
cd ..mv vpnserver /usr/local/
Now, set the right permissions on the vpnserver directory.
cd /usr/local/vpnuserchmod 600 *chmod 700 vpnserverchmod 700 vpncmd
Next, we must create some files to ensure the SoftEther server runs when the Ubuntu server is rebooted. The inbuilt nano text file editor can be used to create and edit the files.
nano /etc/init.d/vpnserver
Now copy and paste the following into the file, and save it (ctrl-o, ctrl-x):
DAEMON=/usr/local/vpnserver/vpnserverLOCK=/var/lock/subsys/vpnservertest -x $DAEMON || exit 0case “$1“ instart)$DAEMON starttouch $LOCK;;stop)$DAEMON stoprm $LOCK;;restart)$DAEMON stopsleep 3$DAEMON start;;*)echo “Usage: $0 {start|stop|restart}”exit 1esacexit 0
Create a new directory and set permissions on the newly created service.
mkdir /var/lock/subsyschmod 755 /etc/init.d/vpnserver
Next, create a new file called “vpnserver.service” in the “/lib/systemd/system” directory
nano /lib/systemd/system/vpnserver.service
Copy and paste the following into the file, save and close it.
Description=SoftEther VPN ServerAfter=network.target
[Service]Type=forkingExecStart=/usr/local/vpnserver/vpnserver startExecStop=/usr/local/vpnserver/vpnserver stop
[Install]WantedBy=multi-user.target
Enable the SoftEther service to start on reboot.
systemctl enable vpnserver.service
Now start the SoftEther VPN service.
/etc/init.d/vpnserver start
You should see the following output:
The SoftEther VPN Server service has been started.
Let’s get started by accessing to the following URL from your PC:https: orhttps:
Note: IP address may vary. Specify your server’s IP address.
Next, enable the server script to start on reboot.
update-rc.d vpnserver defaults
Configuring the SoftEther Server
SoftEther has a handy built-in configuration script to make set up a breeze. To start the script we change the working directory and execute the script.
cd /usr/local/vpnserver./vpncmd
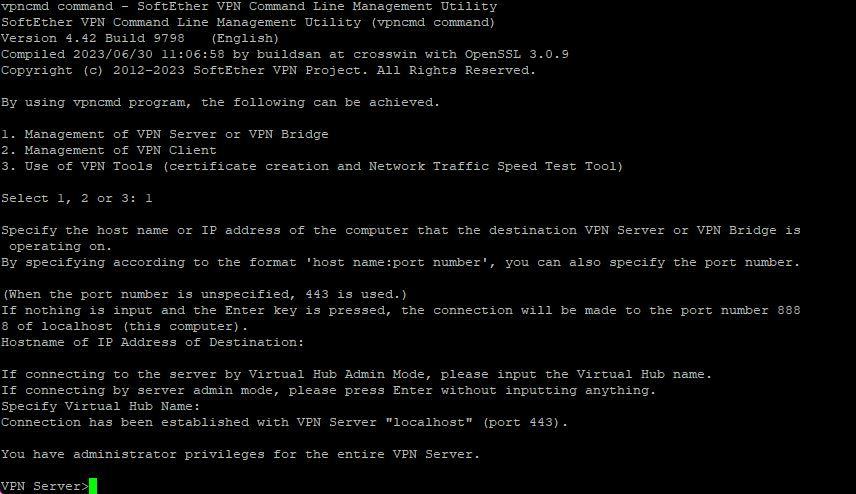
You will see the following choices:
By using vpncmd program, the following can be achieved.1. Management of VPN Server or VPN Bridge2. Management of VPN Client3. Use of VPN ToolsSelect 1, 2 or 3: 1
Select 1, and press enter twice, and you should see the following output:
Before we continue we need to set an admin password
ServerPasswordSet
This is where the admin password for EtherSoft is set, enter your (new) password and confirm.

The Next step is creating a hub, and setting a password (different to the admin password). You can call the hub whatever you like, in this example we have used “VPN”.
HubCreate VPN
Now we configure the hub “VPN” that was just created.
Hub VPN
Your prompt should show:
VPN Server/VPN>
Now, we create the virtual LAN, which assigns IP addresses to remote clients.
SecureNatEnable
The output should now show:
SecureNatEnable command – Enable the Virtual NAT and DHCP Server Function (SecureNat Function)The command completed successfully.
Next we create the first user for the VPN.
UserCreate vpnuser1
You should see the following output:

Next, set a password for the VPN user.
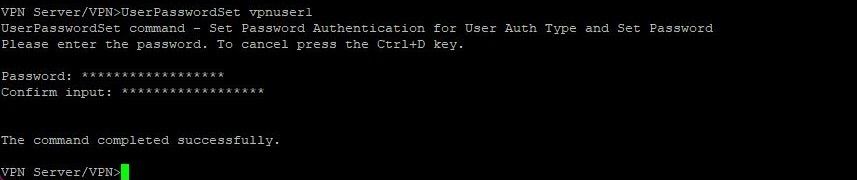
UserPasswordSet vpnuser1
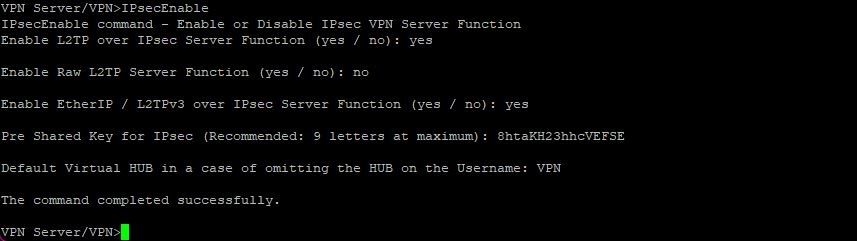
In the next step, the SoftEther multi-protocol platform is configured.
IPsecEnable
You will now be asked several questions regarding which services to turn on. You can use the answers below:
Please note, the IPSec key will be used for L2TP connections, so please make it as complex as possible.
Congratulations, configuration is completed. Type “exit” to quit.
exit
Enabling and Configuring UFW Firewall for SoftEther
If your Ubuntu server was fresh before starting, you’ll need to enable and configure the built-in UFW firewall.
First Set the default policy.
ufw default allow outgoingufw default deny incoming
Now issue the following commands to open the ports required for SoftEther
ufw allow 443/tcpufw allow 5555/tcpufw allow 992/tcpufw allow 1194/udpufw allow SSH
Enable and start the firewall.
ufw enable
Set UFW to start on reboot.
systemctl enable ufw
Finishing Touches and Resources
Congratulations, your SoftEther VPN is now ready for use. At this stage it’s a good idea to reboot the server and ensure all services are running before attempting a client connection.
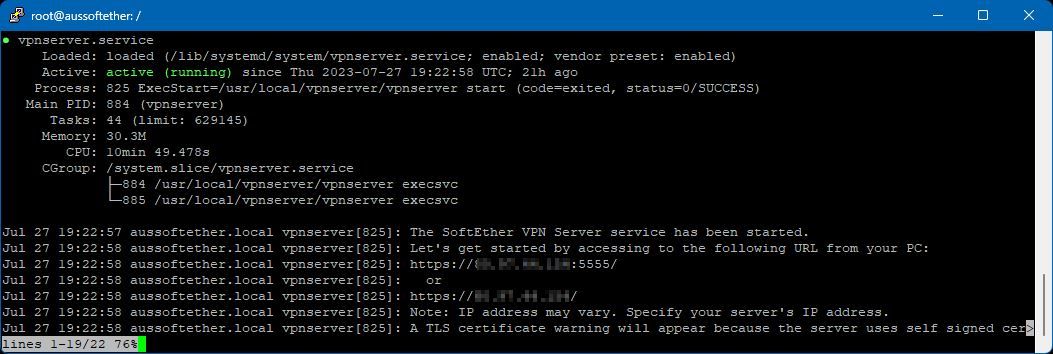
To check the status of the SoftEther VPN server use the command:
systemctl status vpnserver.service
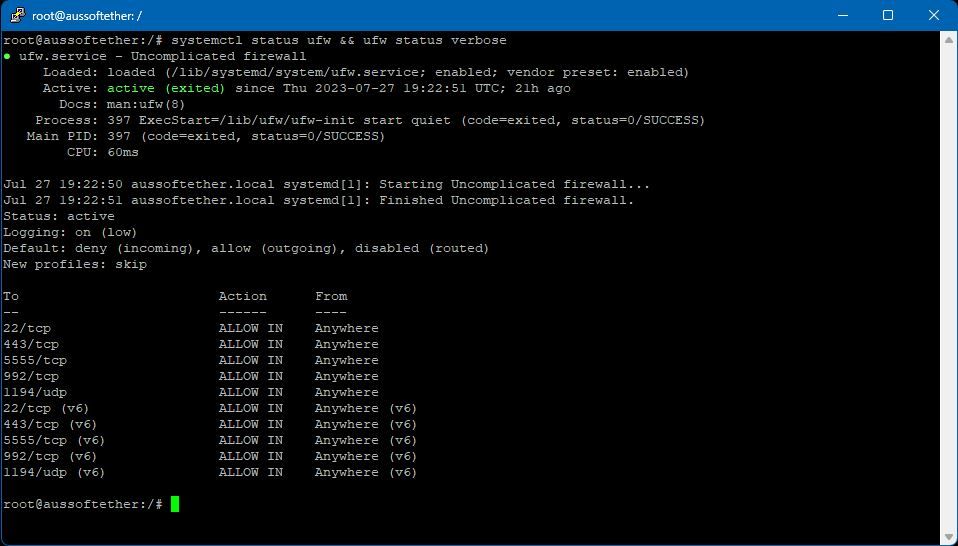
To check the status of the UFW firewall use the command:
systemctl status ufw && ufw status verbose
To connect your Windows PC to your HTTPS SoftEther VPN, the client can be downloaded from the SoftEther website. There you can also find SoftEther’s instructions on how to install and connect the software.
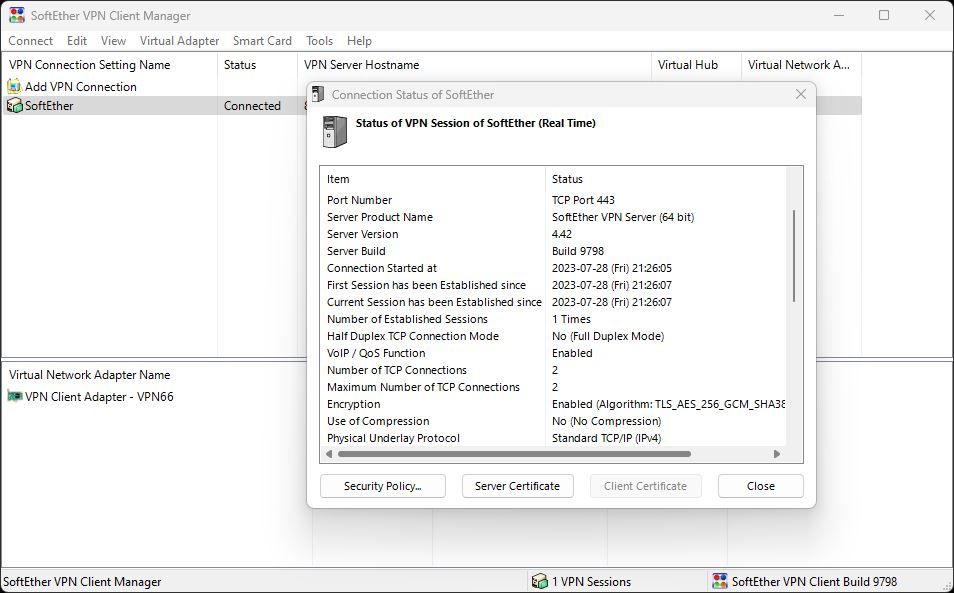
Additional information regarding connecting other operating systems can also be found in the tutorial section of the SoftEther website.
Conclusion
A SoftEther VPN installed on your own Ubuntu server offers numerous benefits, especially in terms of flexible and secure networking.
This little-known VPN software solution can be deployed and used worldwide, and it can circumvent even the toughest VPN blocking techniques. So please spread the word, and enjoy this adaptable and versatile VPN solution.
FAQ
Q: Is SoftEther VPN safe?
SoftEther uses SSL (Secure Sockets Layer) encryption to keep your online data indecipherable and safe. SoftEther is also open source, allowing anyone to audit its code and highlight bugs or security vulnerabilities. You can also use your desired VPN protocol with SoftEther, meaning you can choose the option that you feel is safest.
Q: Is SoftEther VPN fast?
The speed of SoftEther VPN will often rely on the protocol you use with it and the quality of your home or office’s internet connection. Some users find SoftEther VPN slow, while others have no problem with connection speed. You’ll likely have to test SoftEther VPN out for yourself, possibly on different protocols, to see if you can attain a good speed.
Source link


/cdn.vox-cdn.com/uploads/chorus_asset/file/24651774/Google_Keynote__Google_I_O__23______Google_Keynote__Google_I_O__23__2023_5_11_141158.546_1080p_streamshot.png?resize=390%2C220&ssl=1 "Google’s AI pitch is a recipe for email hell")
